
How to Add an IP Camera to a Hikvision DVR
How to add a HIK IP Camera to a Hikvision DVR/NVR without Plug and play POE
Step 1 First, find the IP address (using Advanced IP scanner or Fing) of the camera and note it down for later steps. Then head over to the DVR.
Step 2 Login into the DVR/NVR and open the camera menu as shown in the picture below.

Use Super Engineer AI to fix your CCTV
If you need help with your CCTV or any technical issue, try Super Engineer - a specialist tech AI app, trained specifically to fix technical issues.
Super Engineer has been trained on 1000’s of technical instruction manuals, including Dahua, so can easily help you fix your tech problems - in an instant!
It’s FREE to try, so give it a go at www.SuperEngineer.app

Step 3 In the DVR camera management screen, click on "Custom Adding".

Step 4 In the next screen, add the Liveviz IP camera information as shown below:
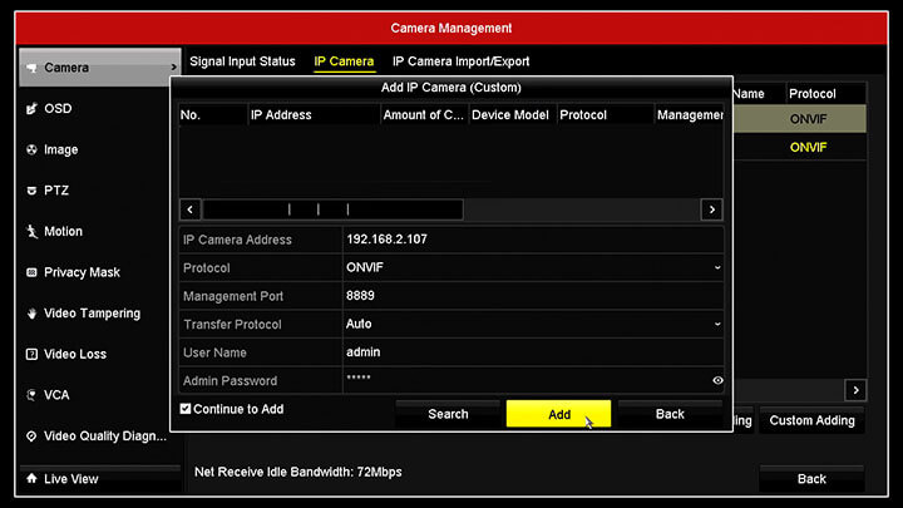
Please note The port number in picture above is not the port number used!
For example:
IP camera Address: Camera’s Internal IP address (For example, 192.168.1.108)
Protocol: HIKVISION
Management port: 8000
Transfer protocol: Auto
Username: admin
Password:
Step 5 Enter all the information and click the "Add button."
The IP camera is now added to the Hikvision DVR/NVR, and you can check the status by looking at the icon.

Note the message "Risk Password" in the Security status which means I'm using a weak password. It's recommended to change the camera password and use a strong one. You can also see the camera name and protocol (Hikvision).
Step 6 Just click the "Back" button to see the IP camera in the DVR main screen. The camera is now added. You now need to configure the recording schedule of the camera to the customers preference, as you would with any other camera.

Use Super Engineer AI to fix your CCTV
If you need help with your CCTV or any technical issue, try Super Engineer - a specialist tech AI app, trained specifically to fix technical issues.
Super Engineer has been trained on 1000’s of technical instruction manuals, including Dahua, so can easily help you fix your tech problems - in an instant!
It’s FREE to try, so give it a go at www.SuperEngineer.app

Still need help?
AMCO Security are specialists in AI CCTV, and provide a CCTV support service & install service for UK-based customers.